CLICK HERE FOR FREE BLOGGER TEMPLATES, LINK BUTTONS AND MORE! »

Sunday, September 19, 2010

Recipe: Jean's Spaghetti Sauce (gluten free)

 A special thank you goes out to my Mother n Law Jean for sharing this recipe with me several years ago. Spaghetti is one of our favorite meals, especially with this delicious homemade sauce on top! This sauce is easy to make, affordable and healthy.

Ingredients

1 t. olive oil
1 T dried minced onion flakes
1/2 t. pepper                               
2 cloves garlic (minced)
1 T dried basil leaves
1 T dried oregano
1 pound LEAN ground beef (no more than 7% fat)
2 15 oz cans tomato sauce
1 small can tomato paste
1 can sliced mushrooms (optional)
1/2 cup grated Parmesan cheese
1 bay leaf
water (1/2 of an empty can of tomato sauce)

1 package spaghetti noodles (we LOVE Trader Joe's corn spaghetti...it's gluten free!)


Directions

 Drizzle the olive oil into the bottom of a large sauce pan. Place ground beef into the bottom of the pan.

(excuse my old pan!) Next sprinkle all the seasonings and garlic on top of the meat. Using a wooden spoon push the seasonings into the meat. (reserve the bay leaf)
 

 Brown over medium/high heat until all the seasonings are incorporated and the meat is browned, using the spoon to crumble the meat as you go.
If you use lean ground beef and dried onions, there should be no need to drain before adding tomato sauce.
Add the 2 cans of tomato sauce.
using a spoon, scoop out the tomato paste into the pan.

Stir well to incorporate the tomato paste. Then add the 1/2  a can of water. (use the empty sauce can)

Stir in the Parmesan cheese.
Stir well until all the cheese in incorporated. Add drained canned mushrooms if desired and bay leaf.
Let simmer on LOW for up to two hours.. If you have a lid with a vent to let steam escape, then put a lid on the pan. If not, careful it will bubble up and "spit" out. You may end up with a mess on your stove top.
When sauce is done, serve with spaghetti noodles. Enjoy!!

Friday, September 17, 2010

Recipe: Shepard's Pie (gluten free)

I'm probably more excited about this recipe than I've been about anything I've made in a long time. I just bought Weight Watcher's newest recipe magazine, Best One Dish Dinners. All the recipes look great and each serving is 6 points or less. This recipe is from this recipe magazine. I can guarantee you however, it DOES NOT taste like like a lower calorie, diet dish. This casserole is DELICIOUS!! As I was preparing it, I kept thinking, "this looks so boring" and "I bet it won't be good enough for me to put on the blog"..how wrong I was. Kevin and Kyle were loving dinner last week the night I served this. In fact they both had seconds. So as you can imagine I'm pretty happy to have this new recipe that is easy, inexpensive AND low calorie to boot. To top it off, for my devoted recipe followers with small kids, this is extremely kid friendly.


Ingrediants
1 t. olive oil
1 small onion diced (I used 1/2 cup frozen chopped onion)
1 pound LEAN ground beef (buy the leanest you can find) or ground turkey
2 cups frozen mixed vegies (I bought a mix with corn, carrots, green beans, lima beans and peas)
3 T. tomato paste
1/4 t. salt
1/4 t. pepper
1 14 oz can lower sodium beef broth (fat free if you can find it)
2 T all-purpose flour (or rice flour, Bob's Red Mill all purpose flour if you are gluten free)
non stick cooking spray
 1 package of dried garlic mashed potatoes (if you can find it use Idahoan roasted garlic..it was so good with this..and they are gfree)

Directions

 Preheat oven to 375

 Heat oil in a large skillet over med-high heat. Add onion;saute 5 min. Add beef,  and cook until beef is browned, stirring to crumble. Drain off liquid/fat. (not pictured, but I sometimes use a potato masher to crumble meat)


 Once drained, add frozen mixed vegies, tomato paste and salt/pepper; cook over medium heat 5 minutes or until vegies are hot, stirring frequently.
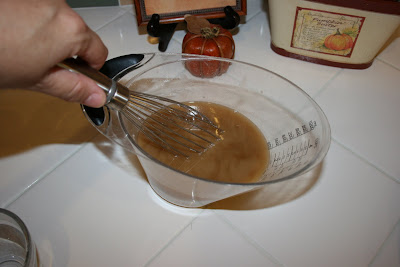
 Combine broth and flour in a small bowl or measuring cup, stirring with a whisk. Add broth mixture to beef mixture. Bring to a boil, and cook 3 minutes or until it begins to thicken, stirring constantly.


Spoon beef mixture into an 11x 8 inch baking dish coated with cooking spray. (I don't have that, so I used my Pampered Chef deep dish stone baker which is close to that size.) Set aside.
Following the directions on the package, prepare the mashed potatoes.
Drop potatoes in spoon fulls evenly over meat mixture. Then spread evenly, carefully covering all the meat mixture. I used a dinner spoon for this and it worked well.


Bake at 375 for 20 minutes or until mixture in bubbling up around the edges and slightly browned on top.

                                                                           ENJOY!

Tuesday, September 14, 2010

All dressed up with somewhere to go


It's not too often we get dressed up to go anywhere these days. In fact the last time was over a year ago at my Dad and Polly's wedding. However two weeks ago our friends Sandi and Dan got married and the occassion presented itself to get dressed up! They got married at a near by estate that was once a private residence and now is used exclusively for weddings. It is set right on a vineyard and we had the best time! Before we left I had Kyle take some picks of Kevin and I and thought I'd share.


Posted by Picasa

Thursday, September 9, 2010

Stamp club projects

It felt so good to go to stamp club again last week!! We took the month of August off as my Stampin Up! Demonstrator Julie rented a house on the beach for the entire month with her family. (lucky girl!) So this month we are meeting twice to make up for not meeting in August. Below are the swap cards I made.


It was fun to use my new paper and stamp pads from the "in-color" line. I love this combination of greens, reds, greens and peaches. Very bright and cheerful in my opinion.

Below is what we made in club. We always get to make three projects and this time we did greeting cards. It is so much fun for me to go over to Julies and have everything cut out and organized so that all I have to do is visit with my stamp club buddies and make the cards. I'm really excited because my new friend Corby (Kyle's friend Blayne's Mom) is joining me as a guest at the next meeting on Sept 23rd where it is my turn to be the hostess AND is joining the club with me for the next 12 month rotation which begins in Oct. I can hardly believe I've been in this club for a year now. I truly enjoy it. This will mark my 6th year stamping with Stampin Up! I went to my first workshop when we had just moved to Vegas in 2004 and soon after met my friend Beverly and stamped in clubs and workshops with her for the next 4 years before we moved.

Don't you just LOVE the texture in the green paper? This is accomplished utilizing a die cutting machine called a "Big Shot" along with a texture plate. I still don't have the Big Shot machine, but plan on getting it in the next few months. I'm just missing out on way too many fun techniques not having that machine!!! These colors are also from the new "in color" line.

Stampin Up! has the most beautiful designer series paper. Don't you LOVE this paper? I love how Julie took strips of the different colors and used them as the main focal point of the page. There is no stamping on this card at all!

Last but not least is this card that really shows off the new colors again as well as another textured back ground of raised dots. I LOVE this stamp set that is called "Friends Never Fade" This red color called "Poppy Parade" is among my favorite colors of all time. It is borderline neon and looks great with so many different colors.

Next stamp club we will be making cards that celebrate FALL. I've already made my Swap cards and I'm looking forward to sharing more stamping goodness with you in a couple of weeks!

Recipe: Chicken Divan

Recently I had the opportunity to bring meals to two ladies from church. One is a close friend of mine that had surgery and another is a sweet gal who just had her first baby. As a member of the Meals Ministry team, I have the pleasure of serving my fellow church members when they have a need to have meals delivered for a short period of time. Typically I bring a casserole of some kind along with a salad, bread and a desert. One of my all time favorite casseroles to bring is Chicken Divan. I've seen a few variations of this recipe along the way, but this recipe which happens to be my Moms is a "no fail" casserole that I"ve been eating since I was a child and making for my family since I was a newlywed. I've yet to meet anyone who doesn't love this casserole! The yummy combo of chicken, brocolli and cheese makes it a real kid friendly alternative too. Here's what you will need:


Ingrediants
1 pkg frozen broccoli florets
4 boneless, skinless chicken breasts
1 can cream of chicken soup
1/4 c mayonaise (I use light)
1/2 tsp. fresh lemon juice 
1 to 1 1/2 cups shredded cheddar cheese
1/2 cup plain soft bread crumbs  (if you are gfree, buy gfree bread crumbs at a health food store or make your own buy pulsing gfree bread in your food processor )
2 T.  melted butter   

Directions  

Cook broccoli until tender according to the package directions. Arrange in baking dish sprayed with non stick cooking spray.
*use either a 9 x 13 casserole dish OR in my case I was splitting the recipe in 2. One casserole for the new parents from our church and one for my family of 3. Set aside.

Next, poach the chicken breasts  in boiling water for 20 minutes.


Remove from water after 20 minutes and let cool on a plate.

While chicken is cooling, mix together the sauce for the casserole. In a medium bowl combine the soup, mayo and lemon juice. Set aside.


 Once cooled, using your fingers or a fork shred the chicken. Distribute the pieces of shredded chicken evenly over the top of the brococoli. Then spread the creamy sauce over the top of the chicken.

                                              Sprinkle the shredded cheddar cheese over the top.
Lastly, combine the crumb topping. Combine the bread crumbs and melted butter and sprinkle evenly over the top of the casserole. (not pictured)

Bake uncovered at 350 degrees for 30 minutes or until heated through and bubbling. Enjoy!!